Applies to Employee Training Management
How to add Employee Training Management to SharePoint Online
Adding Employee Training Management to SharePoint online can be a child’s play if you have Microsoft Teams available and use the bot-guided installer that comes with the Teams App for Employee Training Management to add to and automatically configure Employee Training Management for SharePoint online on a new or existing site with a few clicks.
If you don’t have this option to use the bot-guided installer in Teams, you can use this guide to add and fully configure Employee Training Management on SharePoint online without Teams. If you are not 100% sure you have chosen the right option to add Employee Training Management to SharePoint online, read this article first Adding Employee Training Management to my Microsoft 365 Environment.
Prerequisites
You must be a Global Administrator in your Microsoft 365 tenancy. If this is not the case, please forward these instructions to your administrator(s).
Why do I need an App Catalog site?
Update: Microsoft will create the app catalog site automatically for you. If you follow the steps below and install the app and you don’t have an app catalog site yet, Microsoft will create an app catalog site on the way.
A SharePoint App Catalog site stores the apps that are available for site owners to be added on the sites they own.
If you want to add the app to a site collection app catalog instead of the tenant app catalog, create one for the site collection where you will host your Employee Training Management. Here is an interesting article on Microsoft Learn that explains all details about how to use the site collection app catalog.
This is the way the app-package takes until it is finally added to your site:
- Add the app to the app catalog
- Get the app from AppSource: this places the app in the app catalog site first
- Or download it from our website & upload it to the app catalog site directly
- Make sure it exists in app catalog and enable it. Now, site owners can add it to their sites.
- Navigate to the destination site’s site contents page, click on +New/App and look for the app. Click on Add to add the app to the SharePoint site.
Why should you get the App from AppSource?
The app package on AppSource is checked and verified by Microsoft’s store submissions team and it has passed the “Microsoft 365 App Certification”. (You can read more about our apps and Microsoft 365 App Certification in our Trust Center documents 😊.)
That’s the most secure way to get it and therefore it is the recommended way.
The current version can be added via Microsoft AppSource:
https://appsource.microsoft.com/en-us/product/office/WA200006645?tab=Overview
To install the app form AppSource, click on the link above, click on Get it now and follow the instructions.
When should you get the App from our Website?
There are three reasons:
- It is definitely the latest version.
- Submitting apps to AppSource takes time. Microsoft’s store submissions team verifies apps carefully before they make them available. We appreciate this, because this is a final check done by professional testers. Therefore, the latest version is always available for download even if the submission is still in process.
The following link takes you to the very latest app available on our website:
https://www.sharepointsapiens.com/wp-content/downloads/sapiens.at.sharepoint.etm.sppkg.zip
Download the app using the link below, unzip it and upload the file sapiens.at.sharepoint.etm.sppkg to your tenant app catalog. Don’t forget to click on Enable after uploading the app.
API access
After uploading the app to your app catalog or after adding it from app source, you’ll see a dialog that asks you to enable the app. In this dialog you can see a list of API’s that must be approved after you enable this app. We have prepared an article with more details about API permissions the app requires and what features you cannot use if they are not approved. Learn more about Entra ID App-Permissions requested by Sapiens Apps.
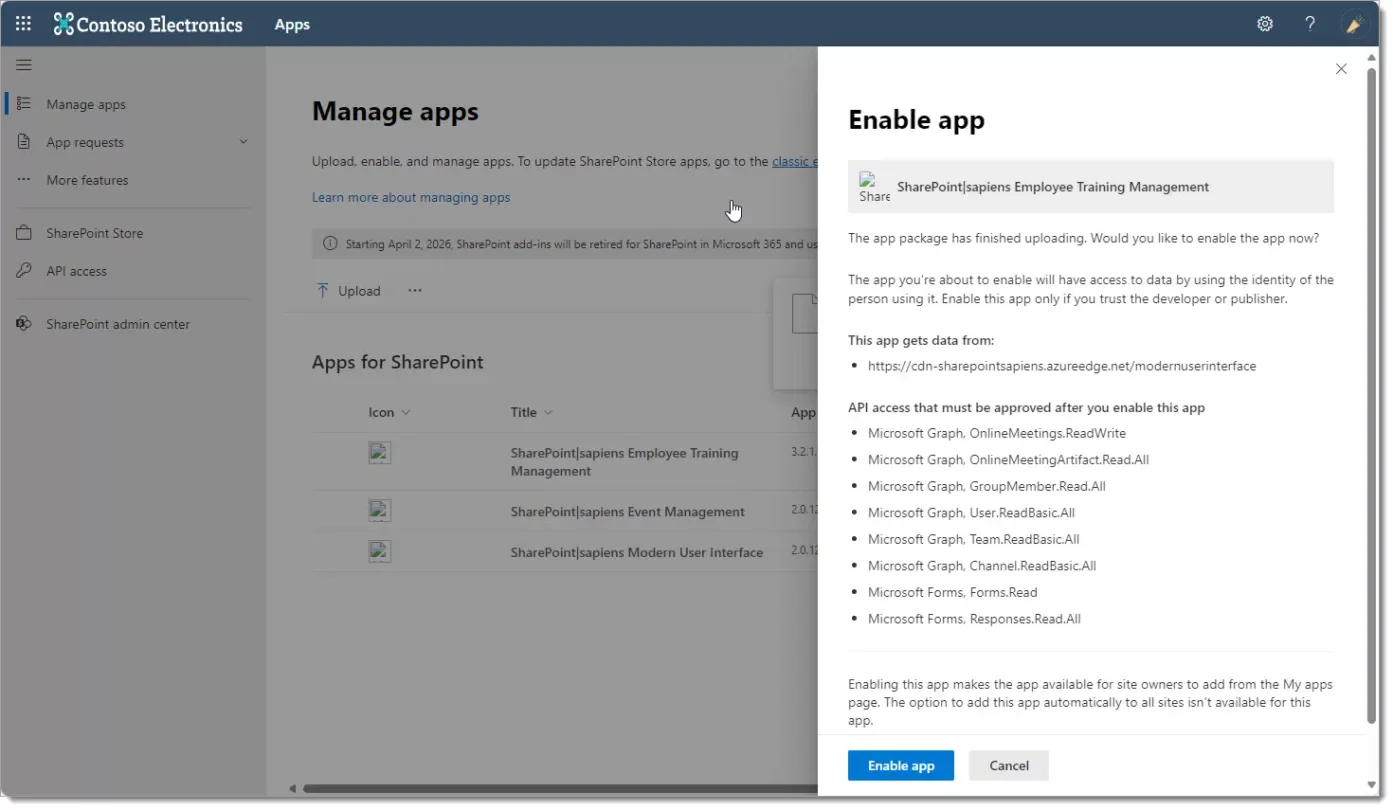
Once you click Enable app you’ll see another dialog with the option to Go to API access page and approve the APIs or to do it later. Our recommendation is to click on Go to API access page and approve the APIs requested by the app for the app to work as it should. These permissions will permit the app to interact with Teams, MS Forms, resolve groups and distribution lists and a lot more.

This will take you to the API Access page in SharePoint admin center. Please approve the requested API permissions. Microsoft offers a great article on Microsoft Learn that you should read to learn more about this: Manage access to Microsoft Entra ID-secured APIs – SharePoint – SharePoint in Microsoft 365 | Microsoft Learn
Add the App to the SharePoint site
Once the app is approved, navigate to the destination site, the site where the app will be added.
Navigate to site contents and click on +New and select App. On the next screen select the “From my organization”-filter and click on the app to add it to your site.

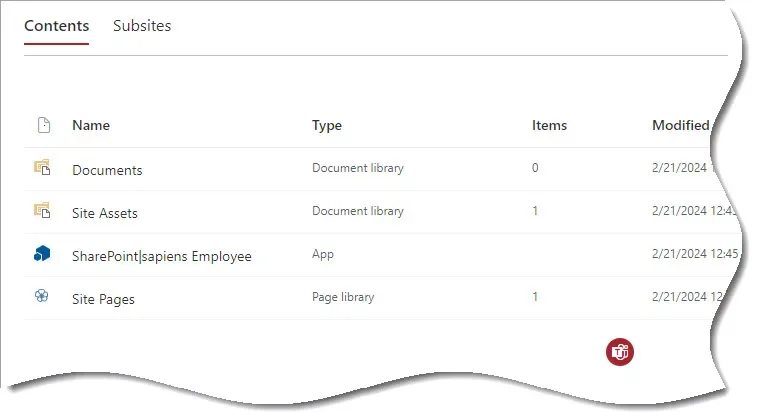
Now navigate back to site contents, you can see the app has been added.
At the top you can see the Click here to start the configuration message.

Do it and click to start the configuration.
Start the Configuration
Learn more about configuring the app in the configuration guide.