Applies to Event Management & Employee Training Management
How to Create Recurring Events in SharePoint
Creating recurring events in SharePoint can be a hassle, especially when it comes to setting up complex patterns. With our app, you can easily set up recurring events in SharePoint Online that follow even the most complex patterns. Just as in Outlook! In this guide, we’ll walk you through the process of setting up recurring events in SharePoint.

How Do I Create Recuring Events in SharePoint?
Setting up recurring events as you know it from Outlook is a child’s play with our apps. You can easily create recurring events in your SharePoint Form by using our field:


Scroll down if you want to get to our step by step guide. If you want to see how it works first, contact us!
Is this part of the app? YES
Make sure you have one of the following apps in this version or higher installed:
- SharePoint|sapiens Employee Training Management Version 3.0.0.0 OR
- SharePoint|sapiens Event Management Version 3.0.0.0 OR
- SharePoint|sapiens Modern User Interface Version 2.0.5.0
After installing the latest version, open the For Administrators page, open the app settings and click on Save.
Step-by-Step Guide to Creating Recurring Events in SharePoint
Follow these simple steps to create recurring events in SharePoint with our app. We’ll guide you through each step, and added screenshots to help you understand the process better.
Add the Recurrence Pattern Column to Your Event Form
Sites created after August 22nd, 2023, automatically have the Recurrence Pattern added. If this is your case, you can continue here: How to create recurring events in SharePoint . If you don’t see the column in your event form, follow the steps below:
Open the event form to create a new event and click on the Edit Form button at the top of the page.

In the Edit Form pane, click on the + to add a new column.

Select the Recurrence Pattern column from the list of available columns.

Create Your Event and Enter the Recurrence Pattern
Fill in the event details, such as the event name, location, and date.
To set up a recurrence, select yes in the Recurrence Pattern column:
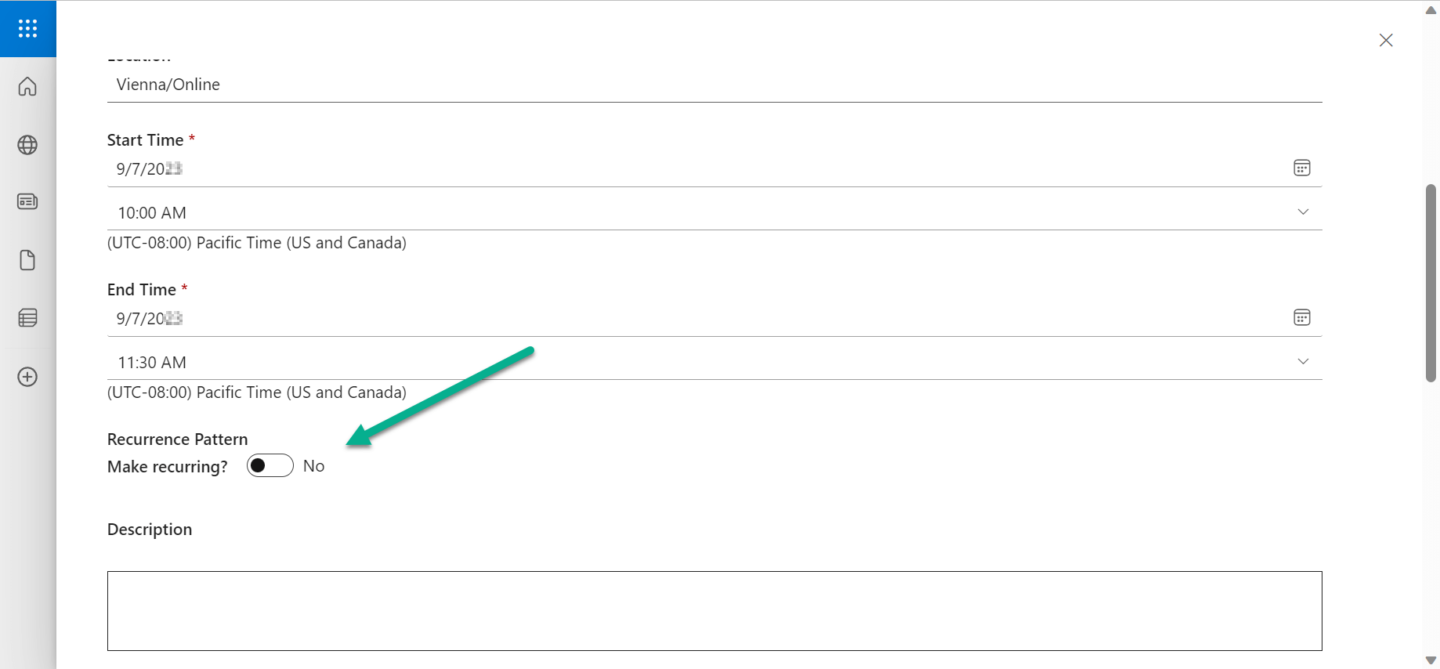
In the Recurrence Pattern section, select the pattern that matches your recurring event. You’ll find options similar to those in Outlook, such as daily, weekly, monthly, or yearly recurrences. Depending on your selected pattern, additional options will appear to customize the recurrence. For example, if you choose ‘Weekly,’ you can specify on which days the event will occur.

- Select the recurrence
- Select the pattern
- Enter a start date: this is the first event that takes place
- No end date: if you do not plan to add an end date to the recurrence
- End by: if the recurrence has a specific end date. Enter the date of the last event.
- End after: if there is a specific number of occurrences planned. Enter the number of event that should be created.
After setting up the recurrence pattern, complete the remaining event details and click on the Save button to create your recurring event.
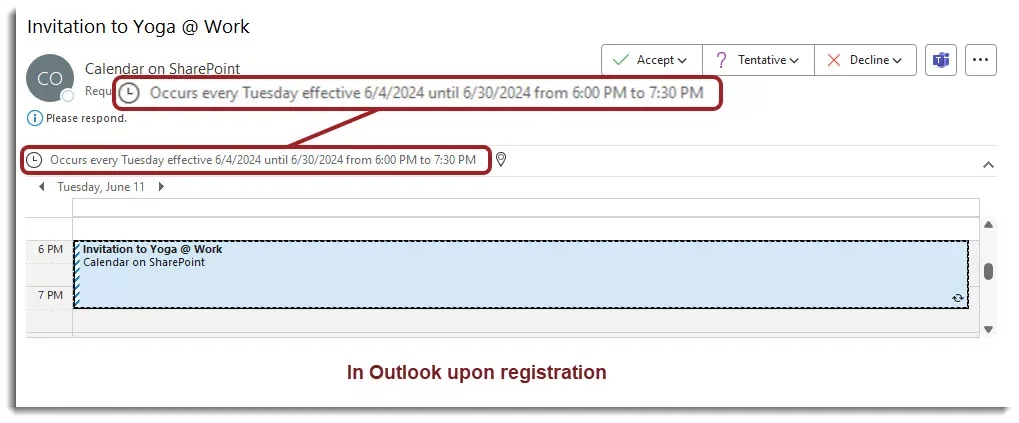
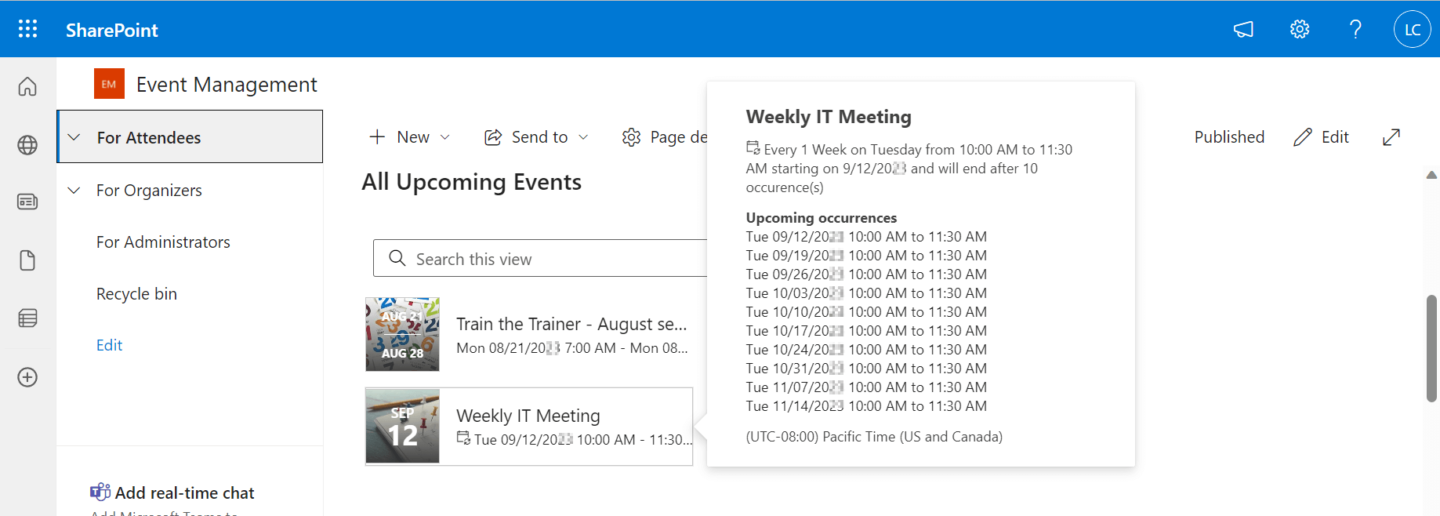
Your event is now visible (including 10 upcoming occurrences) and users can now enroll to all of them in one click:
In this case:
- Users will receive one invitation covering all occurrences
- Users will be enrolled in all occurrences
- The next upcoming occurrence will be visible in the Scheduled events list
Important information: Occurrences will not show separately in the list, only one event will show for the entire recurrence. In the calendar view, only the one recurring event is visible and will show from the start of the first occurrence to the end of the last occurrence. You can however split the recurrence (see below) to create separate events for each occurrence.
Split recurrences into Standalone events
Check this section if you would like to create Standalone events from a recurrence.
It is also possible to publish all occurrences separately as standalone events and enable enrollments to one or certain events from the recurrence. Follow these simple steps.
Important information: Note that it is only possible to split the recurrence if an end date is set and the recurrence contains less than 100 occurrences.
Open the form of the recurring event and select Split Recurrence in the control bar.

Once selected
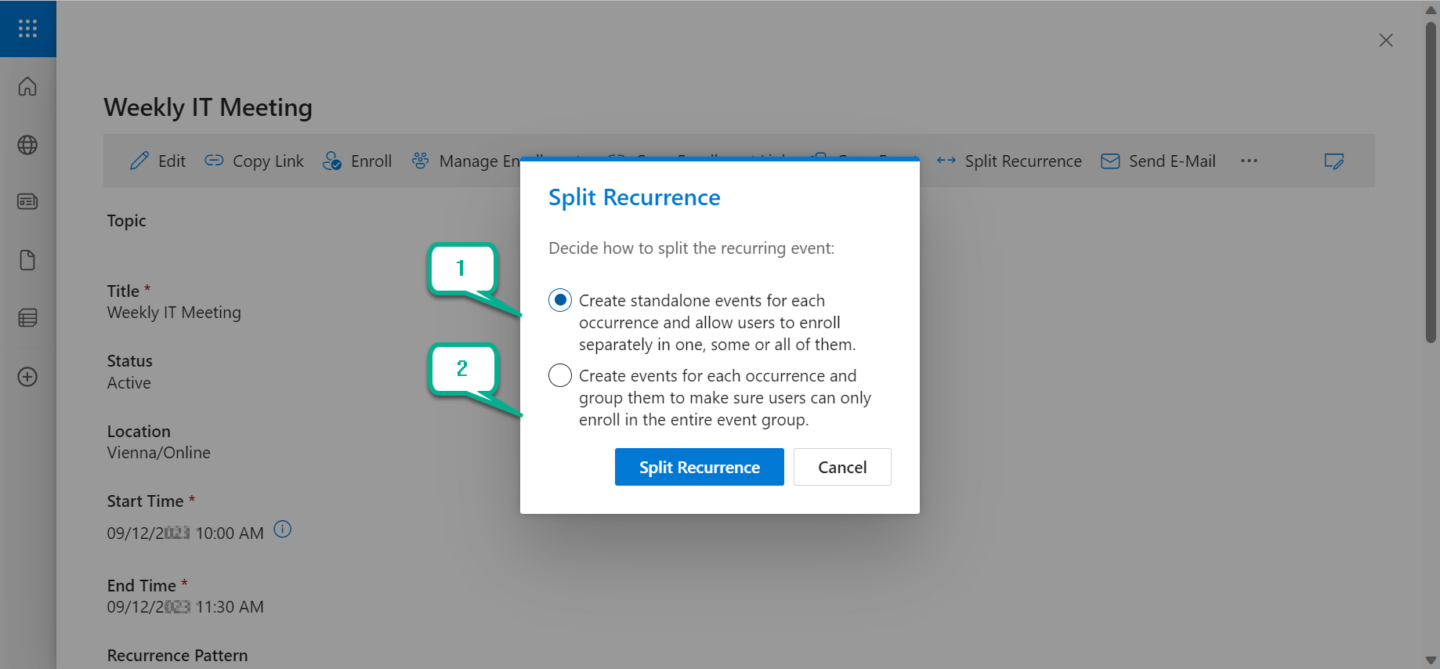
- Enrollments will be possible for one, some or all events. Users will receive an invitation for each enrollment.
- Events will be separated and each occurrence will be visible in the list. Users will only be able to enroll or unenroll to all events in the group. This is particularly useful if certain occurrences are not taking place: the specific occurrences can be cancelled or deleted, and existing events grouped to make sure users will attend all sessions. Note that users will receive an invitation for each event separately. If you are eager to read more about the Event Group feature read our article: Group multiple events in SharePoint Online.
Feel free to contact our experts via support@sharepointsapiens.com if you have any questions. We are always happy to assist.