Applies to Employee Training Management
How to create Self-paced Training & use our Complete Course Button webpart (Add quiz, track time, etc.)
You can create Self-paced training using the SharePoint|sapiens Employee Training Management app to share learning content in SharePoint. In addition, the Complete Course webpart offers multiple and useful features enabling you to add quizzes from Microsoft Form, track time spent on the page or integrate an clickable consent message on your course page on SharePoint. This article is a step-by-step guide reviewing all features of our Complete Course button webpart.
Introduction to Self-paced Training
Our SharePoint|sapiens Employee Training Management app allows you to create self-paced training in SharePoint. You can create course pages and share your learning material in multiple formats: recordings and videos (Streams, YouTube), Presentation on PowerPoint, PDF documents, external links… just to name a few. That way, you allow learners to review content at their own speed. Employees can enroll or be enrolled into self-paced training and will receive a notification per E-mail as usual.
The Complete Course button on the page enables learners to complete a course after reviewing its content. This webpart has multiple settings and options from which you can choose and combine: Integrate a quiz built in MS Forms, track time spent on the page, add a consent box to tick… In this article, we will go through all the options our Complete Course button offers so that you make the best out of it.
Prerequisites
Make sure you have one of the following apps in this version or higher installed:
- SharePoint|sapiens Employee Training Management Version 3.0.0.0 OR
- SharePoint|sapiens Modern User Interface Version 3.0.0.0
This feature is not available in our Event Management app.
After installing the latest version, open the For Administrators page, open the app settings and click on Save.
Create a course
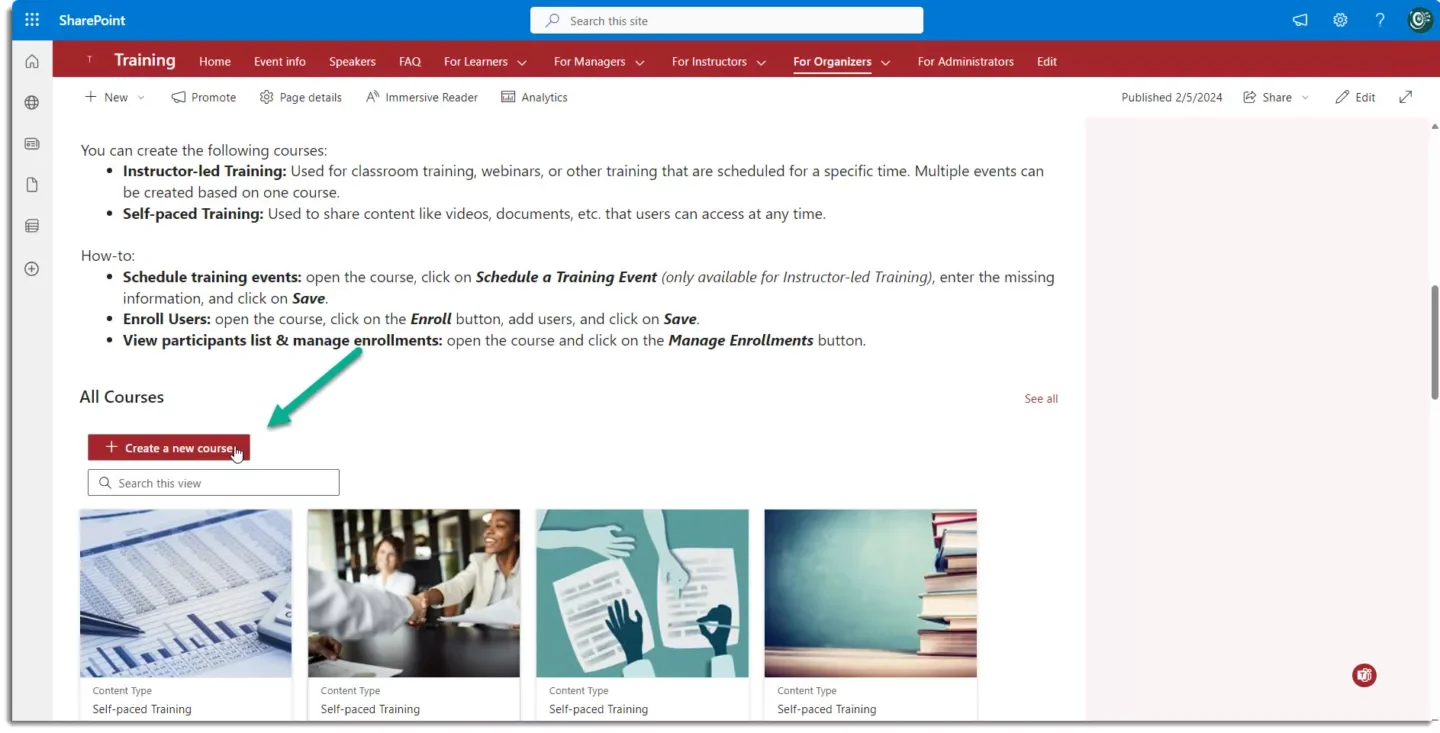
To create a Self-paced Training in SharePoint, click on the For Organizers section, then scroll down to the page. In the All Courses section, click on Create a new course.
After clicking on Create a new course, make sure to select the Self-paced Training Content Type on the top of the form.
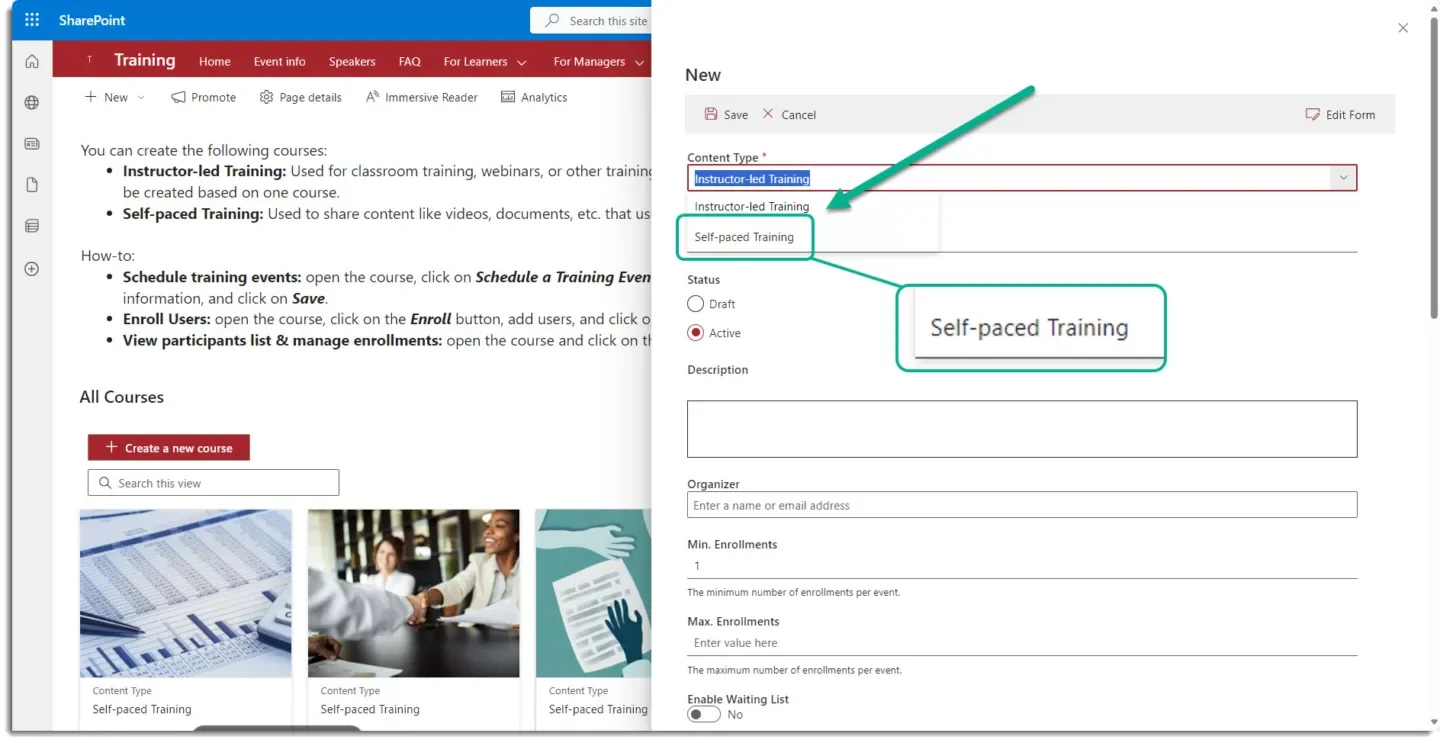
Note that the Complete Course button is only available for Self-paced training; the features contained in the webpart are not available for Instructor-led template. Once you have selected the Self-paced Training Content Type, enter the course name and all further information you would like to share.
Reminder: You can always use the Edit Form icon in the top right-hand side to add or remove fields as needed: How-to: Editing forms for events, topics, courses, etc., – SharePoint|sapiens.
Finally, click on the Save button to create the course.
Create a Course Page
The newly created self-paced Training in SharePoint should appear in the For Organizers page All Courses section. As shown in the screenshot below, there is a hyperlink to the Course Page section.To create a course page, organizers can do so by simply clicking on the Create Course Page hyperlink.

If you click on Create Course Page, the course page will open. The course page can also be accessed from the list view (All Courses list).
Configure the course page
Each course page contains distinct sections that can be easily customized. Organizers can easily add or remove sections based on their requirements.
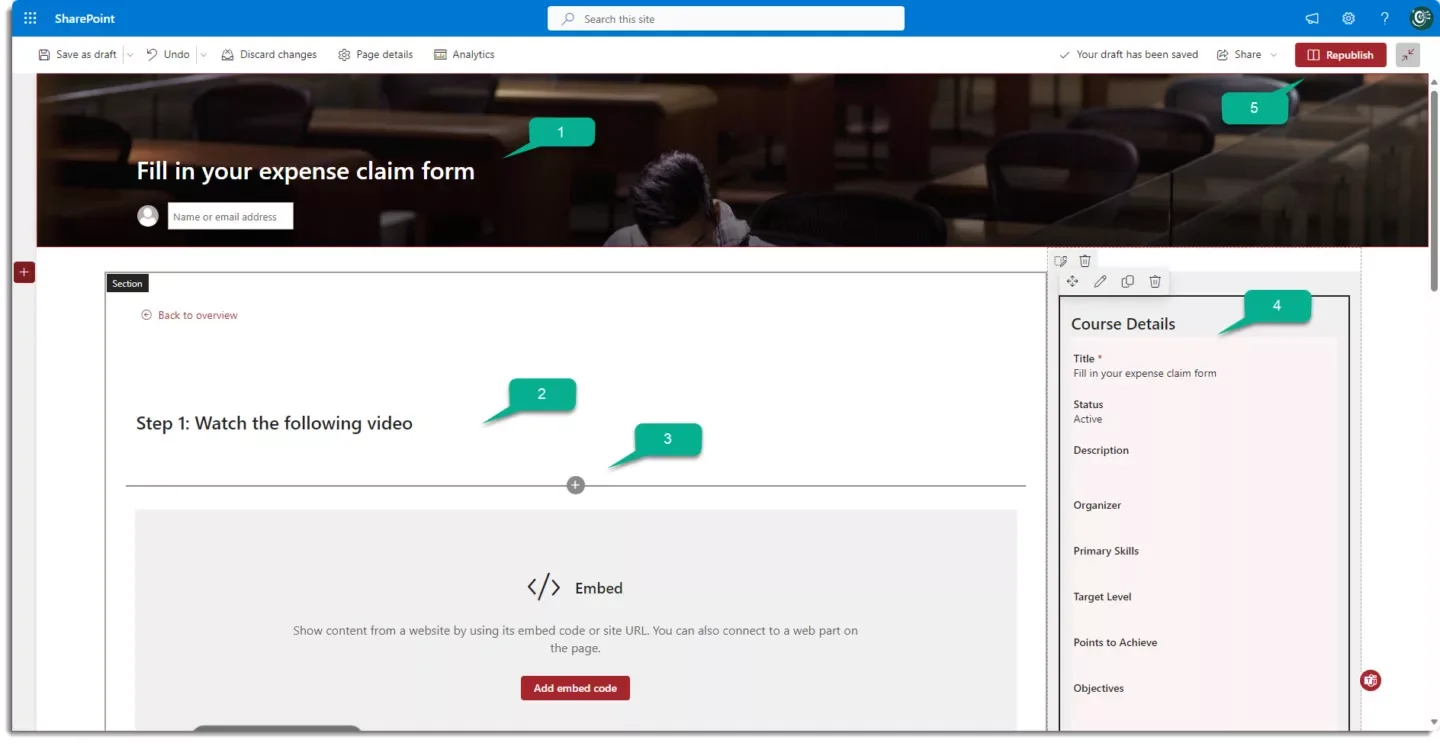
- In this section, it is possible to customize the Title, add a contact person and change the background image of a course page.
- It is a SharePoint Text web part. Each title, text, instruction, or hyperlink can be placed in this section. It is possible to add or remove the Text web part according to your needs.
- Arrow in between the sections to add SharePoint webpart to your course page.
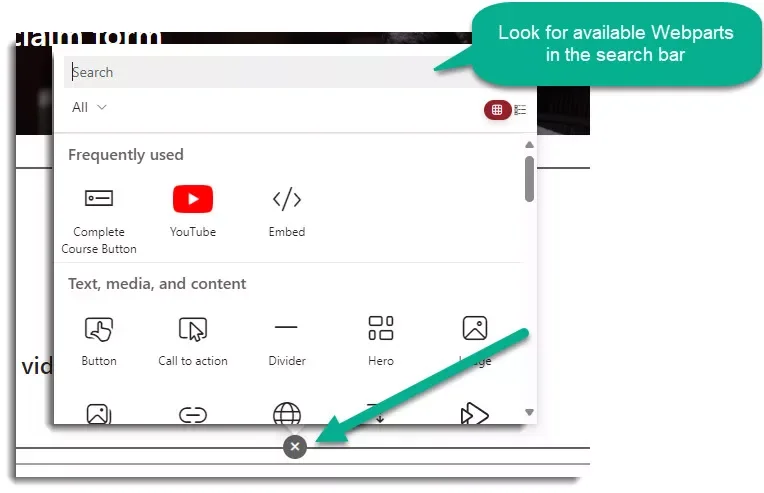
Add images, text, or course content by using the appropriate and available webpart. Text for a textbox, Image if you want to insert an image, File & media viewer to upload content such as PDF, PowerPoint, Stream recording. If you want to learn more about webpart, check Using web parts on SharePoint pages – Microsoft Support
- Edit the Form containing the course information in this section.
- To publish and save your configuration & customization, click on Republish in the top bar on the right corner to publish the page.
Configure the Complete Course Button Webpart
You can configure each SharePoint webpart, by clicking on the Edit Web Part icon in the associated web part zone.
The Complete Course Button web part’s configuration form contains five different sections.
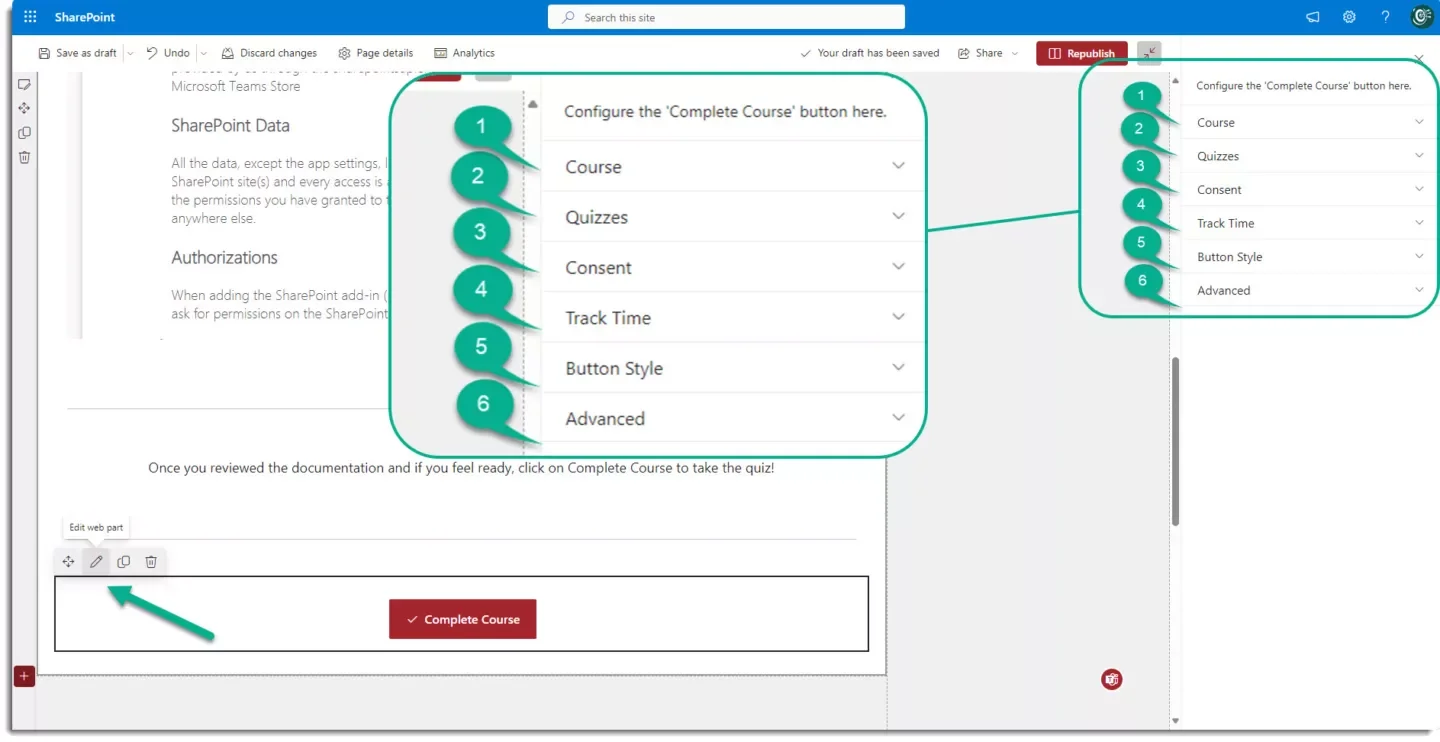
1. Course
You do not need to modify this section if you created the course as mentioned above. This is only relevant if you add the Complete Course Button webpart manually on the page. If this is the case, enter the list and item ID to link the button to the course.
2. Quizzes
In this section, you can easily add a quiz created in Microsoft Forms or select an existing one. Good news! There is the option to define a minimum of points required to be able to click complete the course. If you want to get more details on this specific feature, have a look at our dedicated article here: How to add a Quiz on SharePoint Online using Microsoft Forms
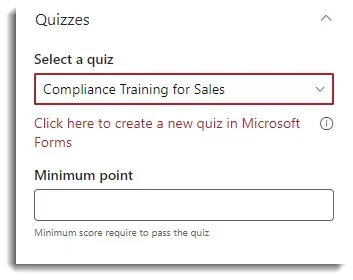
If there is no quiz required to pass the course, leave it with No Quiz required. In this case, no further action is necessary, and no other textbox in this section will show.

If you want to get more details on this specific feature, have a look at our dedicated article here: How to add a Quiz on SharePoint Online using Microsoft Forms
3. Consent
Turn this on, if you would like to add a customizable tick box for users before they complete the course.
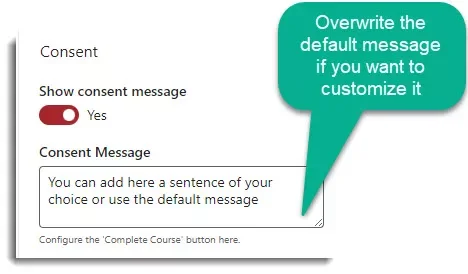
This is particularly useful if you need the learners to confirm that they have read the documentation. In that case, learners can only complete the course if they tick the box.

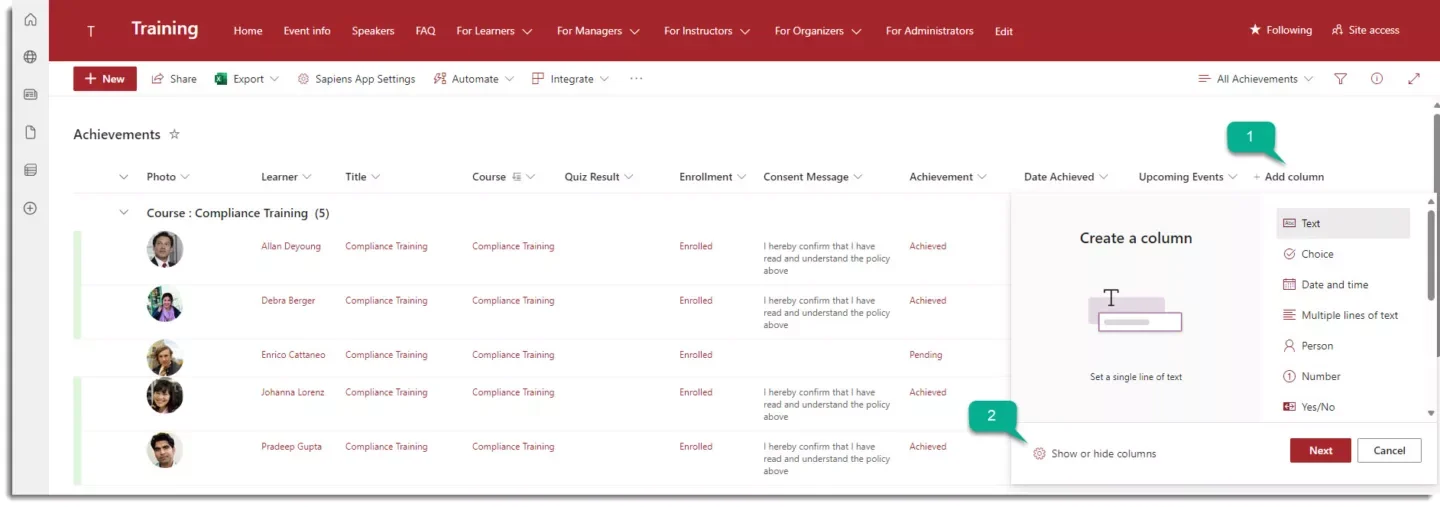
For reporting purposes, you can add the Consent Message column to the achievement list.
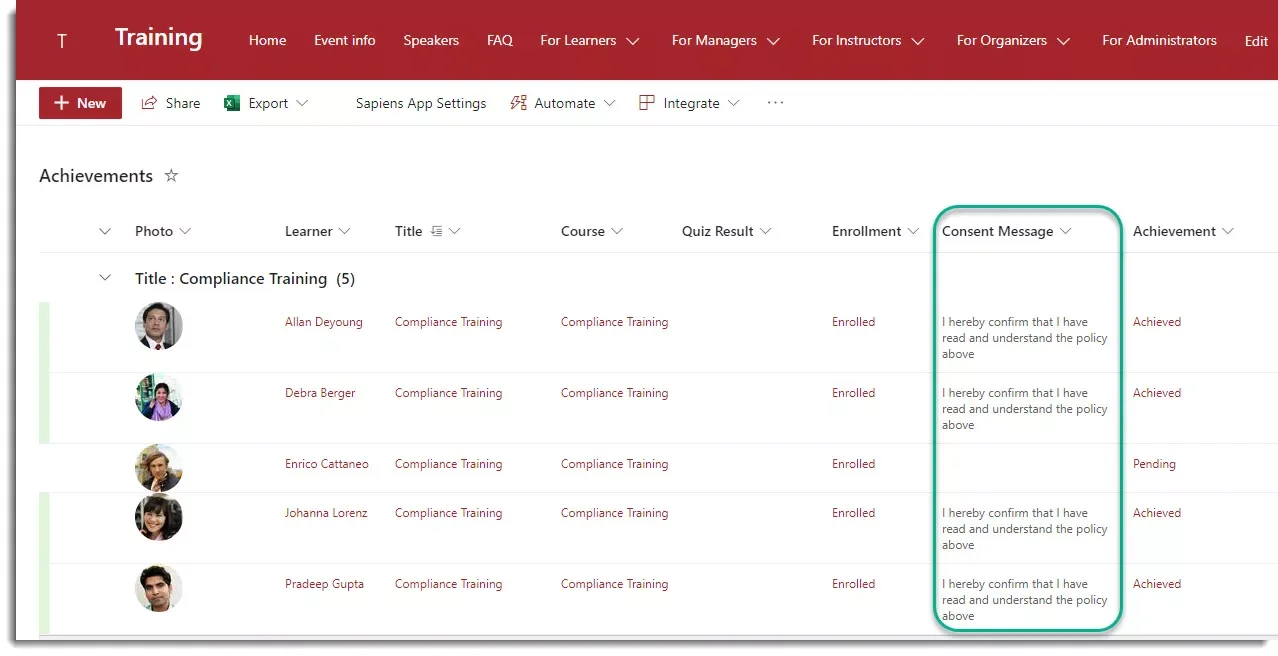
To add a column in the list, simply navigate to the list, click on add column and on Show or hide columns and select the column Consent Message before clicking on Apply.
4. Track Time feature
If you turn the track users time to On, the web part will track the time users spent on this course.
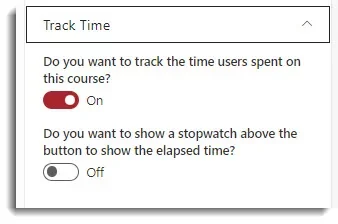
You can also add a stopwatch counting the time spent on the course page:
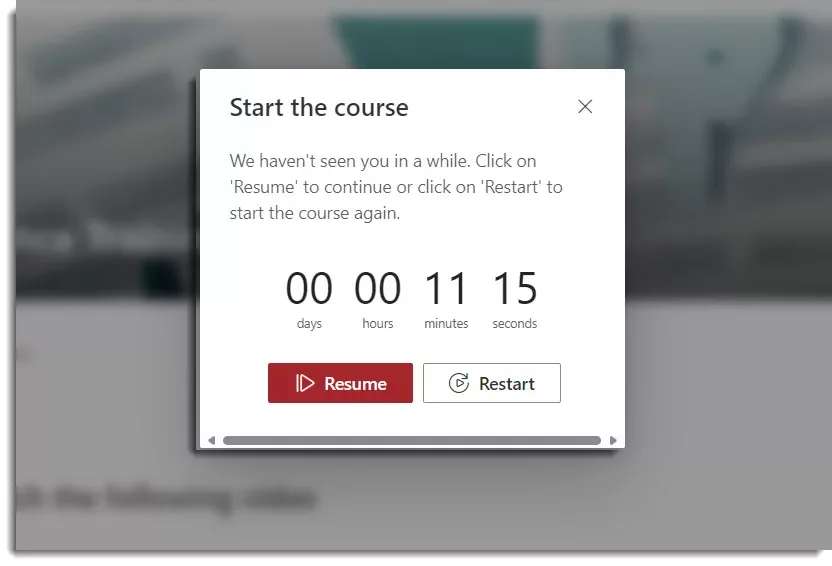
If the learner leaves the page and comes back later, the following message will show to ask if time tracking should restart.
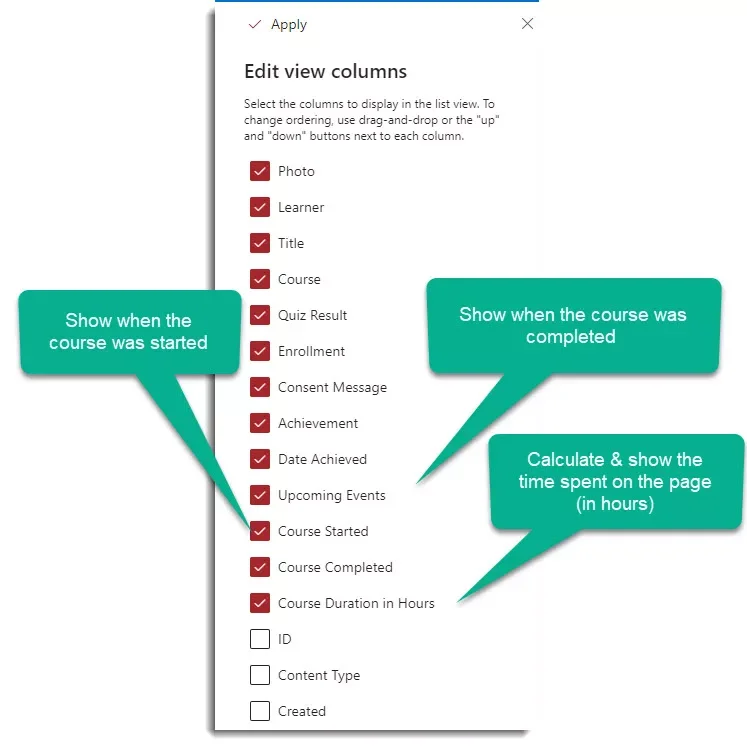
To get a good overview of the time spent by learners on the page, you can add the following three columns in the All Achievements list:
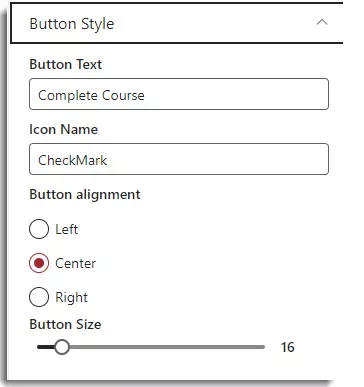
5. Button Style
In the Button Style section, you can change the appearance of the Complete Course button, including the caption, icon, location, and size of the button. The Icon Name can be the name of any fluent UI icon.
6. Advanced
In the Advanced section, you can set up:
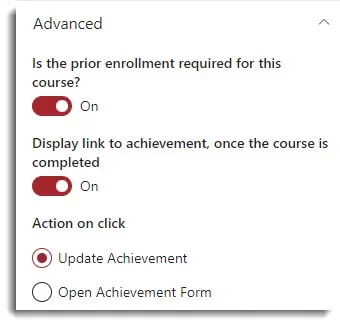
- If you would like users to enroll before reviewing the course content. If this is set off, learners will be able to review the content and complete the course without being enrolled. Whether they are enrolled or not will not impact the achievement. Achievement will be saved in both cases.
- Choose to show the achievement link or not. The Action on click adjusts the achievement behavior after clicking on the button Complete Course.
- Update Achievement: achievement will be automatically updated if learners click on Complete Course
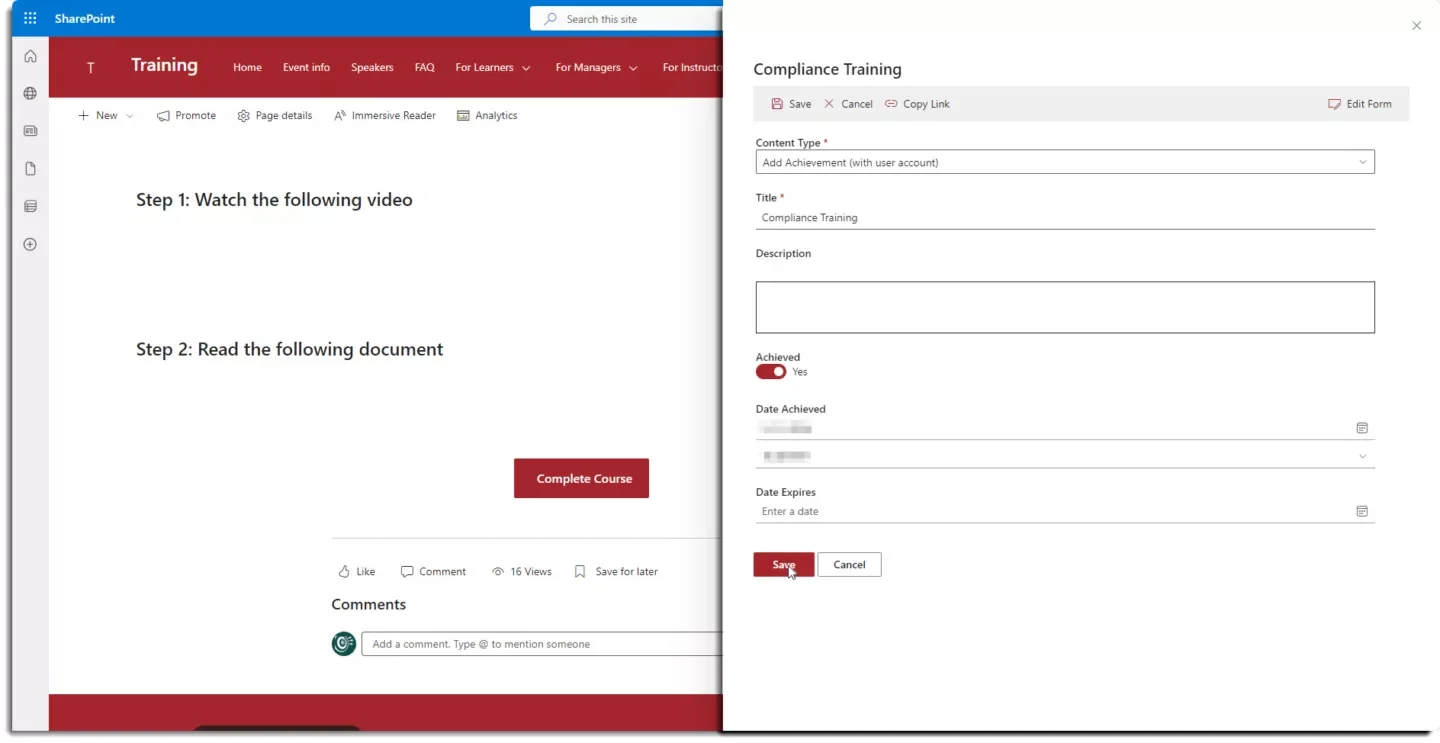
- Open Achievement Form: will open a dialog allowing the user to review their achievement, upload a certificate etc. before saving it and have it automatically updated.
That’s it, we covered all sections! Now you know how to create self-paced Training in SharePoint and setup our Complete Course button. If you have any questions or feedback, feel free to contact our support team support@sharepointsapiens.com.