Applies to Calendar E-Mail Extension on SharePoint online
Configuration to check attendee & resource availability in Calendar E-Mail Extension for SharePoint Online
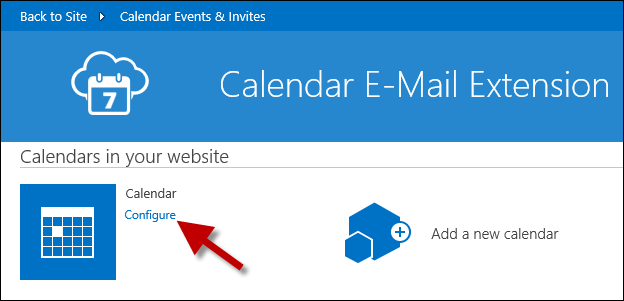
After you have successfully added the Calendar E-Mail Extension for Office 365 Add-In to your SharePoint Online site, you can now continue by configuring the resource availability check.
If everything is configured correctly you will see the availability for all rooms and equipment when clicking on the ‘Check Resource Availability’ button. In this article I will show you how to configure it so that the availability will be checked automatically when saving the event and only the availability of the selected rooms, equipment and users is displayed.
To achieve this, you have to register a script in the new and edit form and all view pages of the calendar list. The add-in does not have permissions to register the scripts for you, so you can either change the permissions or register the scripts manually.
Prerequisites
Before you start, you have to make sure that custom scripts are enabled on your website. Scripting capabilities are disabled by default for: Personal sites, Self-service created sites, Group sites, Communication sites and the Root Site Collection of the Tenant.
You can verify if custom scripts are enabled, if you edit a page and try to add a Script Editor Web part. If the Script Edit Web part is available, custom scripts are enabled and you can skip the next section. If the Script Editor Web Part is not available, please follow the instructions in the next section – Enable custom scripts.
Enable custom scripts
To enable scripting on a particular site collection immediately, use the following PowerShell command using the SharePoint Online Management Shell.
# Change this URL to match your admin site
Connect-SPOService -Url https://-admin.sharepoint.com
# Enter username and password
# Change this URL to match your SharePoint site
Set-SPOSite -Identity https://.sharepoint.com/sites/yoursite -DenyAddAndCustomizePages $false
If you still receive the same message, please check your script again and make sure you used the full URL to your SharePoint web site.
Alternatively you can also enable custom scripts in the SharePoint admin center, but this approach only works for SharePoint MySites, Personal OneDrive sites or any SharePoint site collection created based on self-service site creation.
In the SharePoint admin center, click on settings and check the Custom Script section.

Any change to the custom script setting made through the SharePoint Online admin centre may take up to 24 hours to take effect.
Now you can continue with either Option 1 or 2.
Option 1: Change the permissions of the add-in
- Open the SharePoint online site where the add-in is installed and navigate to http://<SharePointWebsite>/_layouts/15/AppInv.aspx.

- Enter the following App Id and click on Lookup.
d4f43231-f66d-4f82-93b1-bd5a9d9945c1

If you don\’t see the correct add-in information, the add-in is not installed on this site or you have an older version of the add-in installed. - In the Permission Request XML box, enter the following xml:
<AppPermissionRequests AllowAppOnlyPolicy=\"true\" >
    <AppPermissionRequest Scope=\"http://sharepoint/content/sitecollection/web\" Right=\"FullControl\" />
</AppPermissionRequests>
- Click on Trust it.
- Click on the Calendar E-Mail Extension for Office 365 add-in in the site contents page
- Click on Configure on each calendar list where the add-in is configured and save the settings again.
The scripts are now registered. If you want to reset the app permissions, repeat the first 4 steps and use the following permission xml:
<AppPermissionRequests AllowAppOnlyPolicy=\"true\" >
    <AppPermissionRequest Scope=\"http://sharepoint/content/sitecollection/web\" Right=\"Manage\" />
</AppPermissionRequests>
Option 2: Register the scripts manually
- Open your calendar and then select Edit Page from the settings menu.

- Then select Add a Web Part at the top of the page and choose the Script Editor from the Media and Content section.

- Click on EDIT SNIPPET and then enter the following script:
<script type=\"text/javascript\" src=\"//addins.sharepointsapiens.com/cee2/scripts/cee_client.js?v=160705\"></script>

- Now click on Insert and Stop Editing to save your changes.
You now also have to add this script to the new item and edit item forms.
To do this go to http://<SharePointWebsite/Lists/YourCalendar>/NewForm.aspx and http://<SharePointWebsite/Lists/YourCalendar>/EditForm.aspx and select Edit Page from the Office 365 settings menu. Then follow the instructions above.
This script communicates between the Exchange resource and the calendar/new form/edit form, so that it knows what information you have already entered.
If you have any questions of feedback regarding our Office 365 products, please send an e-mail to support@sharepointsapiens.com.